Behind the scenes

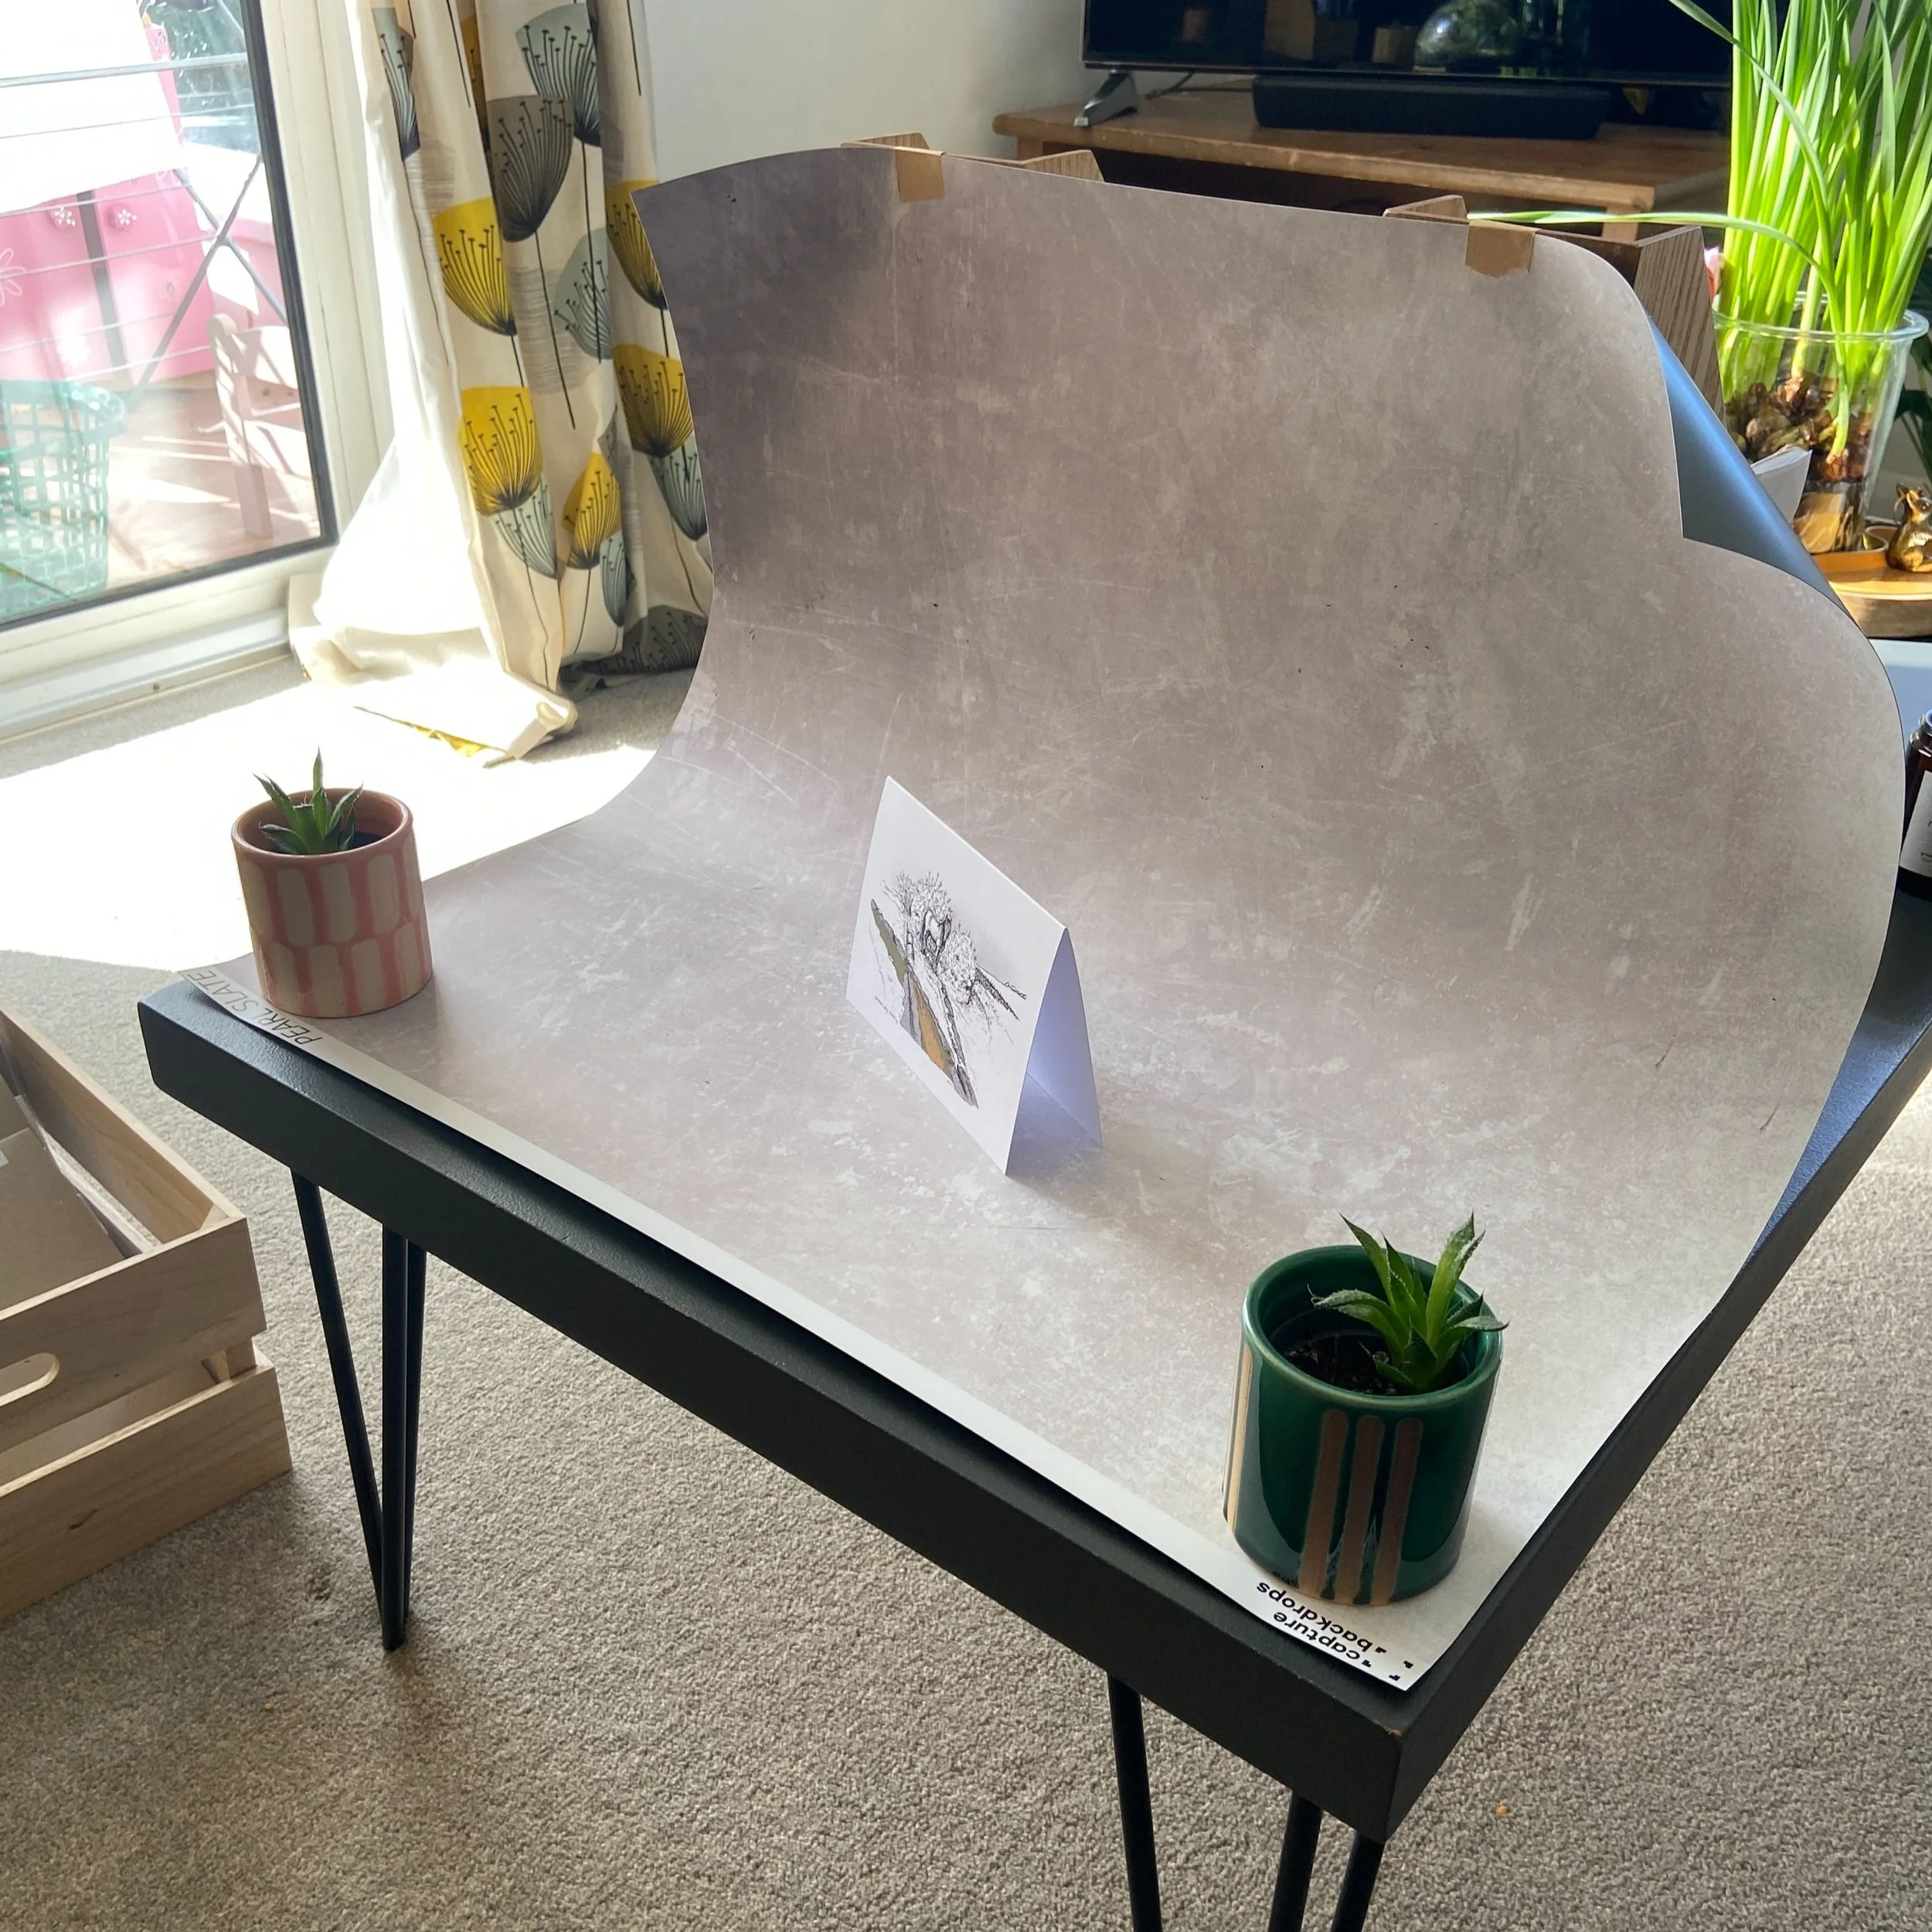

My photo ‘studio’
Images are seriously important to a business, whether it’s creating the ‘feel’ of a brand or displaying products so people know what they’re buying, as customers we all absorb a multitude of impressions from photography. As a business it’s a constant flow of work, making sure photos of products are up to date, refreshed, depict the product well and show customers its uses, scale, size and quality, having photos available to send out to press or to use on our own websites and social channels… it’s a never ending task. Fortunately I find it an enjoyable one!
Let’s be clear from the outset - I don’t have the budget for professional photography or expensive shoots. I wish I did! Great photographers are worth their weight in gold and professional imagery that is spot on for your brand is a huge asset. I know several professional photographers who are amazing and well worth the investment in their time and work - so if you can invest in professional product or brand photography, do it!
I thought I’d write down some of my thoughts and tips that may be useful for other small business owners like me, doing their own photos. I have done a lot of photography and worked digitally with images for my whole career, including 20 years’ managing website content and creating websites, which I find hugely helpful now managing my own ecommerce website, social media channels, and producing my illustration work.
Helen’s top tips:
Background is critical. Let’s face it, not many homes are instagram-ready all the time, I know mine certainly isn’t! I bought a vinyl background (widely available online, try Amazon and Ebay amongst others) which has been incredible for giving a professional, consistent look to my photos and showing off the product really well (instead of background clutter!). Go for whatever style suits your brand, mine is a concrete effect, there are many including wooden board effect, whitewashed wood, etc. Go as big as possible - A4 size is going to be difficult unless you’re doing flatlays of very small products. Even a large sheet of card will work well - go to an art & craft store and buy a large A1 sheet of card in a plain colour that will suit your products and brand (for example I wouldn’t choose white for mine as most of my illustrative work has white backgrounds). I chose a vinyl background for durability, I didn’t want the dog eared edges that paper backgrounds would get - and also I need to tape it to something to create the vertical background behind my products that really makes the difference, so I didn’t want to rip it by taping it time and time again. No one would know from the photos that they’re taken on my coffee table, with the background taped to some wooden box files, with the usual family detritus all around!
Camera - you can achieve great photos with your smartphone. That’s all I use for mine. It’s quick, it’s effective, I can airdrop the photos from my iphone to my mac to optimise them and get them on my website in moments. If you’ve got a ‘proper’ camera then that’s great too. But I’m a huge believer that having fancy gear does not equal great photos without a good eye, good lighting and great cropping. If you need to keep it steady or need to have your hands in shot, invest in a small flexible tripod (such as Gorillapods or I have an Octopus tripod) to hold your phone in place.
Lighting - this is the main one, you can get away murder if the lighting’s great! I don’t have any photography lights, nor a lightbox. Both are brilliant, however I have to work with what I’ve got. Make sure you use natural light from a window or outside, as households lightbulbs make photos very yellow. If you have light all around from a conservatory or skylights, those create lovely light - however bright sun is no good as it will create glare and strong shadows. So just a generally bright or lightly overcast day is ideal. It’s not easy in the UK in winter time - I find photography of Christmas items very tricky as there’s no decent light, which is usually because I’m doing these far too late in the year! So if you can shoot Christmas products at other times of the year, that’s perfect. Make sure your product is facing towards the light, and make sure your shadow isn’t across the shot (not always easy, I know).
If you need to photograph framed artwork, can you remove the glass from the frame for the photo, or can you invest in non-reflective gallery glass? It’s a game-changer.
Cropping - crop, crop, crop! When you take your photo, give the product lots of space around it. If your photos are going to go on your website - take the photo landscape or portrait accordingly, so it will work well depending on the image style on your site. Take both orientations if necessary, leaving lots of space. Make sure the orientation suits the actual product! (ie a long slim landscape painting is going to be tricky to work well on a website set up to use tall thin portrait images). When you’ve selected the best images - then crop them to remove excess background or any distractions (cropping to the appropriate size and shape). Don’t zoom in to capture small details - instead crop a wider photo to the details you want to show and save the image as a copy. Too often people try to zoom in or get really close to a detail but the camera can’t properly focus on it, giving a rubbish result - crop a beautifully sharp photo instead. When uploading images to Instagram you can crop and edit the image directly in the app of course. Including all this space when you take the actual shot gives you choice when you use the images.
Optimising photos for websites - uploading a huge high quality photo (even one from a phone camera) to a website without editing it will make it load slooooowly and affect your customers’ experience using your site, as it will just add to the page load. There are free programs available to manage images, I use Photoshop as I have done for many, many years and it’s an essential tool in my business so it’s a subscription I pay monthly. Reduce the physical dimensions of your image (cropping helps too) and you don’t have to save it as a maximum quality jpeg - high or medium quality will be fine, and 72dpi is the appropriate image resolution. If your photos are taken on a phone they will be RGB which is suitable for the web - uploading CMYK photos to a website will mean they’ll display on monitors in crazy colours (eg light green may look like a harsh neon green), so if one of your images looks wrong in terms of colour and was not originated on a phone, that’s a likely reason why.
If you require the photos for print, eg to send to a press publication, the images will need to be CMYK, 300 dpi resolution and dimensions of about 20cm. It is a good idea to keep the high resolution versions of your images (and/or original image files) as well as low res, edited versions that you use on your website etc, so that you have them available when they’re required for print purposes or the press. Don’t overwrite the original versions with low res versions, as you don’t want to lose the high quality versions forever! If they’re too big to keep on your phone or computer, get a separate drive to move them on to.
Stock photography - sometimes photos are just really hard to get and you need to use some stock photography. There’s nothing wrong with that! But choose carefully. Make sure you’re choosing images that are royalty free or are paying the correct fee for your intended use of the images. Do not ever download images from Google and put them on your website! Good stock image libraries include Unsplash (free), or Shutterstock (paid) or istock (paid). You can also get great icons and graphics made by creators on these sites to use royalty free or paid for. Don’t go for naff, obviously ‘stock’ imagery as it will devalue your brand!
If managing your website or optimising images and so on is just not your bag - outsource it. Work with a great web designer, content writer, or social media manager to lighten the load. For PR I can recommend Louise Cox PR for making PR accessible and achievable to all. I work with several great clients creating and maintaining their websites and content, so am very happy to help, drop me a line.
Need photos of yourself but can’t get the budget together for professional photos? There are lots of brilliant courses. I recommend checking out Rosie Parsons Photography, she has great courses including Slay Your Selfies to help you get fabulous photography yourself.
#websitecontent #photography #images #websiteimages #productphotography #photoshoot #photographytips #hintsandtips #smallbusiness #businesstips #independentbusiness